I posted a blog entry a couple of weeks ago about
paper samples from Anchor Paper. Over the weekend (well, two weekends ago), I've found the time to actually make the mock-up for the pocketfolds. I wanted a vertical style invitation as oppose to a horizontal one.
I initially planned to do a pocket fold invite like this:
 |
| (photo from Cards and Pockets) |
However, I realized that it will take much work to do the pocket this way as compared to doing it the usual way I see it as DIY online. This is how the pocketfold will look like:
 |
| (photo from Cards and Pockets) |
I found great instructions from
Heather Drive's wedding blog and
Wedding Bee DIY hive. Eventhough the pocketfold invite that I'll do is designed for a horizontal invitation design, I'll just tweak the design a little to look good for vertical invites.
The sample papers that got are only 8"x11", the pocketfolds that I'll be doing are 7" x 15.75". I taped a different color paper to get the length that I needed. You'll get what I mean once you see the pictures. :) The measurements are 3" for the pointed flap, 5" for the main invitation, 4.75" for the pockets and 3" for the pocket flap. I created the mock up using a Fiskars paper cutter to make sure that every cut are straight. I need to get a scoring blade for scoring the paper to make it easier to fold.
 |
| (found the perfect paper in Stardream Ruby 105# cover) |
 |
| (white portion is the one that I taped to extend the paper to get 7" x 15.75") |
 |
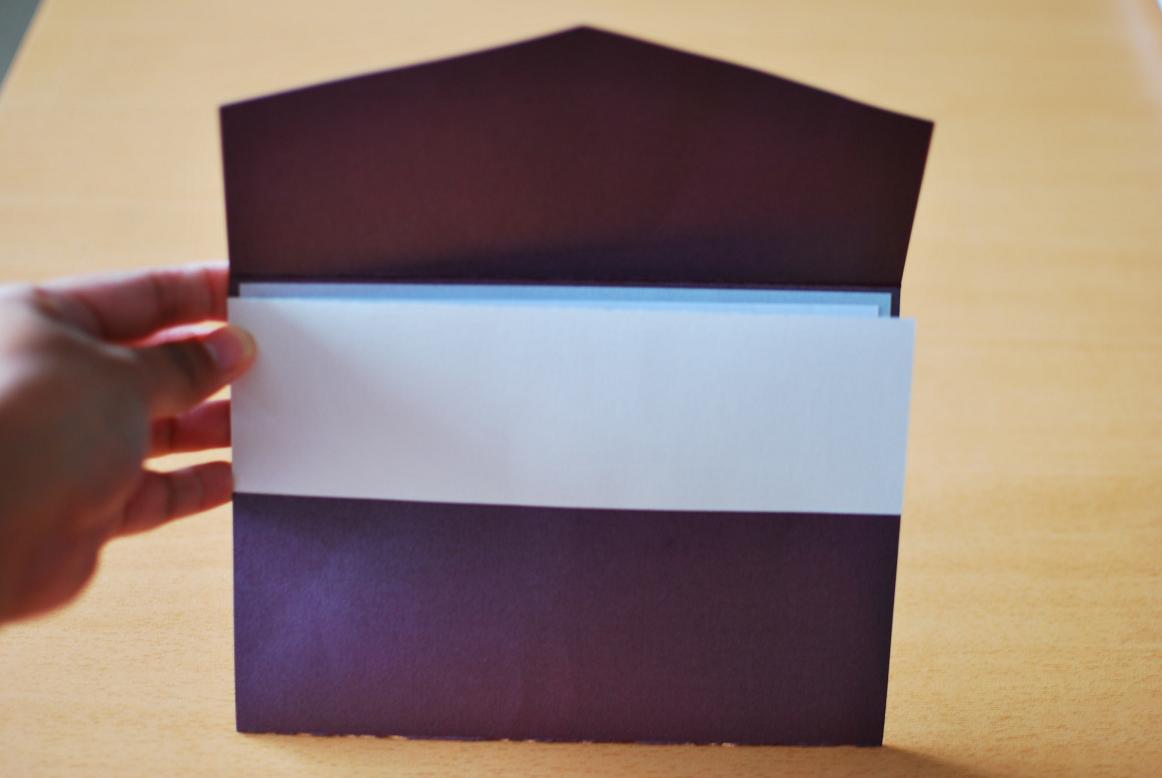
| (vertical orientation; not happy with the folds, need to get a scoring blade for a smoother fold) |
 |
| (the mock-up; Stardream Ruby 105# Cover for the pocketfold, Stardream Silver 81# Text for invitation mats, Rec Bright White Linen Paper 80# Cover for the Main Invitation and inserts) |
I need to replace the double-sided tape that I've used in the pockets, I need one that's thinner. The current one is 1/4" thick and I'll need one that's only 1/8" thick. By using the thinner tape, I can make the inserts a bit longer.
Measurement details are as follow:
- pocketfolds: 7" x 15.75"
- invitation mats: 4.75" x 6.75"
- main invitation: 4.5" x 6.5"
- entourage insert: 4.5" x 6.5"
- location map insert: 4" x 6.5"
- reception card insert: 3.5" x 6.5"
I've ordered the envelopes (from EnvelopeMall) and the paper materials (Anchor Paper) by bulk online. They should be all here by this week. No more procrastinating. Time is ticking. I still need to decide on the belly band and the paper seal/monogram seal for the invitations. Will get to it asap.


